Selecting Distinct Values
Often, it's essential to ensure that each value you select from a set is unique. While selecting distinct values alters the inherent probabilities, this guide will walk you through a straightforward approach to achieving this using the Depletable Lists feature of RNGNeeds.
Selecting Unique Rewards
Imagine a scenario where you'd like to offer players three unique rewards upon completing a game level. Using the Depletable Lists feature is the ideal option here, as each picked reward will be automatically depleted, thus appearing in the result only once.
To learn more about the concept of Depletable Items, visit this page in our documentation.
Firstly, let's establish a basic Reward class. This class will:
- Contain details about the in-game currency.
- Provide relevant information to the drawer through the info provider interface.
Basic Reward Class
using System;
using RNGNeeds;

[Serializable]
public class Reward : IProbabilityItemInfoProvider
{
    public string currency;
    public int value;
    public string ItemInfo => $"{currency} ({value.ToString()})";
}
Subsequently, we'll introduce a LevelCompletionRewards component that will be responsible for housing our range of potential rewards.
Add a ProbabilityList for Rewards
using UnityEngine;
using RNGNeeds;

public class LevelCompletionRewards : MonoBehaviour
{
    public ProbabilityList<Reward> rewards;
}
After attaching the component to a GameObject, you can begin shaping your array of rewards.
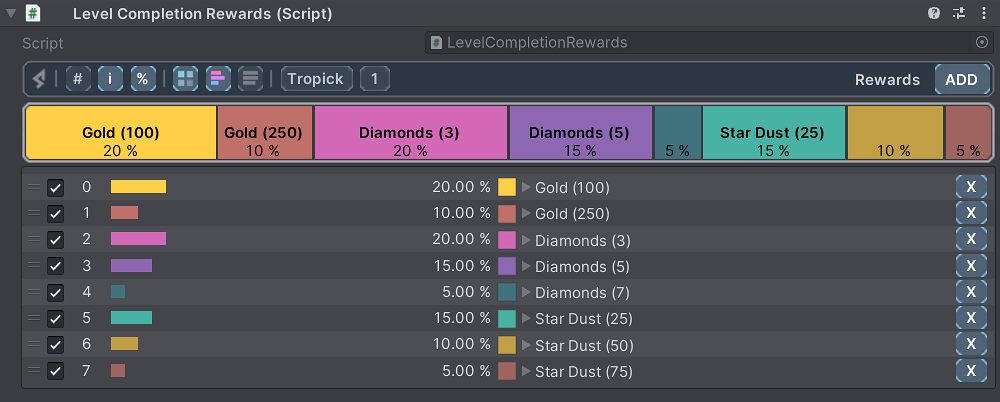
With the reward pool in place, it's time to set the list as Depletable. First, ensure the Advanced options are enabled:
-
Activate Advanced Drawer Options Level: Navigate to the Preferences window and switch Drawer Options Level to Advanced. Activating this global setting will reveal advanced features across all your Probability List inspectors.
-
Open the PICK section of the drawer and click the Depletable button. By default, each Probability Item is marked as Depletable with
1 / 1available / maximum units. -
Turn on the Maintain Pick Count option and set the Pick Count of this list to
3. -
Enable the Visualize Units in the Stripe option to better display the remaining units for each item.
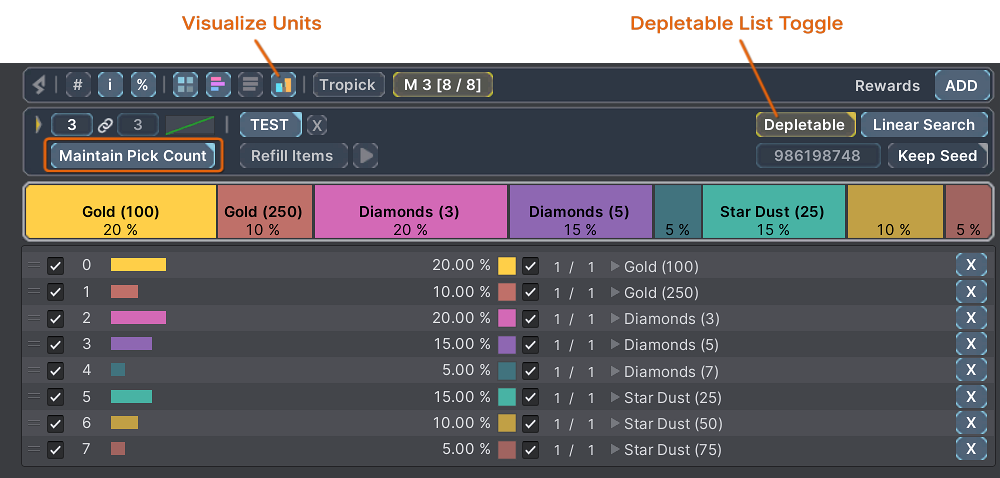
When you click the TEST button, it selects three distinct items from the list, taking into account the probability distributions and the units available. Since each item has only one unit available, each is selected just once. The remaining units are clearly displayed on the stripe, and the unit counts beside each item decrease accordingly. With repeated testing, the list is depleted until no items remain selectable.
Hint: Hold Control (or Command on Mac) while clicking the TEST button to automatically refill the units of items before initiating the test. Alternatively, you can manually refill items through the Action Menu by clicking the Arrow Button adjacent to the selected action, typically set to Refill Items by default.
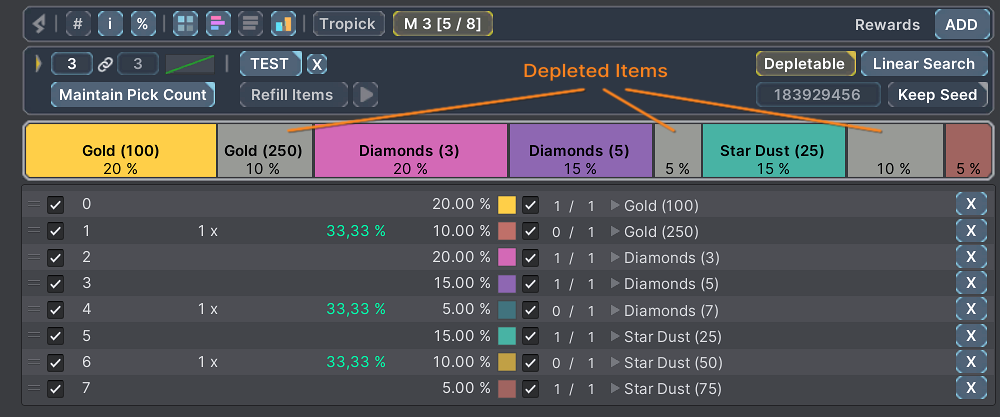
Now that we've established our list of unique rewards and tested the outcomes, the final step involves implementing the code to select the rewards.
Incorporate the following method into the LevelCompletionRewards component:
Add the PickRewards method
public List<Reward> PickRewards(int count)
{
    rewards.RefillItems();
    rewards.MaintainPickCountIfDisabled = true;
    return rewards.PickValues(count);
}
Before selecting values, the PickRewards method performs the following operations:
- Refills the units of all items to their maximum, ensuring every reward is accessible in case they were depleted in the last pick.
- Sets the
MaintainPickCountIfDisabledproperty totrue, assuming the list was not already configured this way in the inspector.
To see this in action, invoke the PickRewards method:
Test the distinct selection
var pickedRewards = PickRewards(rewardsToPick);

foreach (var reward in pickedRewards)
{
    Debug.Log(reward.ItemInfo);
}

// An example console output with three unique rewards could be:
// Gold (250)
// Diamonds (7)
// StarDust (50)
Alternative Approach
Before the introduction of the Depletable Lists feature in v0.9.7, selecting distinct values was commonly achieved by disabling the item just picked, preventing its selection in subsequent picks. While this method is less efficient in terms of code and performance—each picked item required a unique selection call within a loop—we're retaining this guide should you choose not to use depletable items.
First, create the Reward and LevelCompletionRewards classes following the guide above.
After attaching the component to a GameObject, you can start shaping your array of rewards.
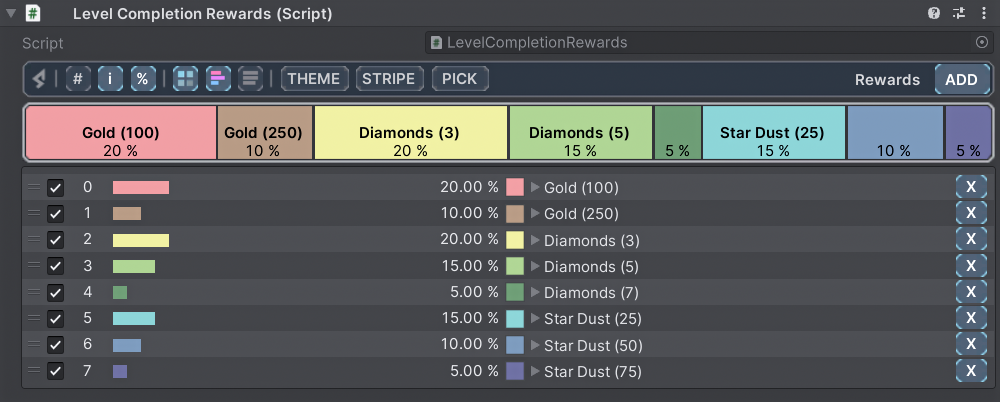
With the reward pool in place, it's time to introduce the logic ensuring that only distinct rewards are chosen. Incorporate the following segment into the LevelCompletionRewards component.
Add Distinct Selection Logic
using UnityEngine;
using RNGNeeds;
using System.Collections.Generic;

public class LevelCompletionRewards : MonoBehaviour
{
    public ProbabilityList<Reward> rewards;

    public List<Reward> PickRewards(int count)
    {
        rewards.SetAllItemsEnabled(true);
        rewards.MaintainPickCountIfDisabled = true;

        var pickedRewards = new List<Reward>();

        for (var i = 1; i <= count; i++)
        {
            if (!rewards.TryPickValueWithIndex(out var pickedReward, out var pickedIndex)) continue;
            pickedRewards.Add(pickedReward);
            rewards.SetItemEnabled(pickedIndex, false);
        }

        return pickedRewards;
    }
}
Let's break down the PickRewards method:
- It initializes by ensuring every reward is accessible for selection using
.SetAllItemsEnabled(true). - The
MaintainPickCountIfDisabledproperty guarantees that each pick will be successful even if disabled items are present in the list. - For each desired reward, the method picks a reward, adds it to the list, and then immediately disables it to ensure uniqueness.
When you combine disabled items with the 'Maintain Pick Count' setting, the resulting probabilities will shift with every newly disabled item. For a deeper understanding of the logic behind this and its implications, please refer to the section on disabled items on the Selecting Values page.
To see this in action, invoke the PickRewards method:
Test the distinct selection
var pickedRewards = PickRewards(rewardsToPick);

foreach (var reward in pickedRewards)
{
    Debug.Log(reward.ItemInfo);
}

// An example console output with three unique rewards could be:
// Gold (100)
// Diamonds (5)
// StarDust (75)
Post-testing, examining the list will reveal that chosen items have been disabled.
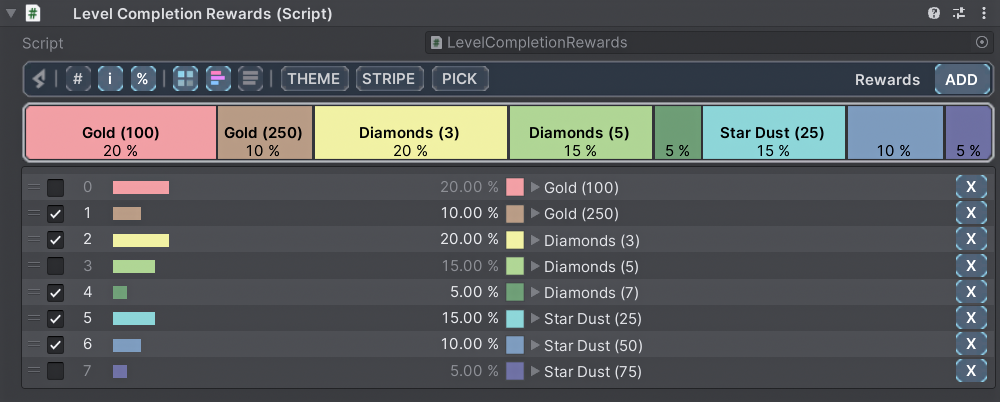
In conclusion, by momentarily disabling each item post-selection, this method efficiently curates a set of entirely unique items from the list.
Recommended Approach: Using Depletable Lists is generally more effective and streamlined. This feature not only simplifies the process of managing unique selections but also improves overall performance by handling item availability directly within the list structure.