Getting Started
This page shows the fastest path from installing RNGNeeds to making your first working weighted list in Unity. If you are evaluating the plugin, this is the best page to confirm what the setup flow actually looks like and how little code you need to get value from it.
By the end of this guide, you will have RNGNeeds imported, a ProbabilityList<int> visible in the Inspector, and a small reusable die example that demonstrates how weighted picks work in practice.
Installation
Make sure RNGNeeds is already available in your Unity account. Open your Unity project and follow these steps to import it.
1. Open the Package Manager
In the Unity Editor, go to Window » Package Management » Package Manager.
2. Find RNGNeeds in My Assets
In the Package Manager window, select My Assets from the left sidebar under Sources.
You should see RNGNeeds - Probability Distribution listed among your assets. Click on it to select it.
3. Import the Plugin
With RNGNeeds selected, click the Import button on the right side of the Package Manager window.
If prompted, make sure all files are checked in the Import Unity Package dialog and click Import.
4. Verify the Installation
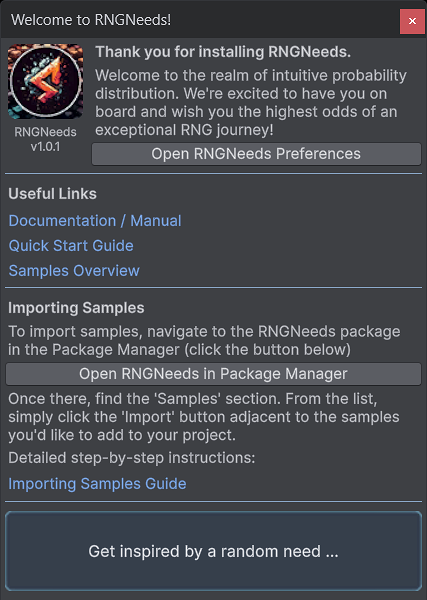
After the import is complete, a Welcome Window should pop up.
It provides handy links to our documentation, a getting started guide, instructions for importing samples, and a direct shortcut to the RNGNeeds preferences window.
To verify the installation, open RNGNeeds Preferences Window by either clicking on the shortcut button, or navigate through the Unity Menu:
- On Windows - click on the Editor Menu Bar » Edit » Preferences.
- On Mac - in the top bar, click on Unity » Settings
In the window that appears, click on RNGNeeds in the left part.
After opening the RNGNeeds preferences window, a message about loading default preferences and color palettes should appear in the console.
The RNGNeeds Plugin installs as a Package. This means that its contents will not appear in your Assets folder as usual, but instead in the Packages/ folder.
This approach helps reduce clutter in your Assets folder and allows RNGNeeds to operate through the Package Manager.
Open the Package Manager » In Project » Packages - Starphase Lab. You will see two packages listed in this section:
- RNGNeeds - This is the main package for this plugin.
- Starphase Core - This is a dependency of RNGNeeds, and it's a small collection of common utilities.
Quick Start
To start using probability distribution in your project, add the generic ProbabilityList<T> class to one of your classes, or create a new script by right-clicking in the Project panel and choosing Create » C# Script
You can use multiple ProbabilityList in any of your MonoBehaviour or ScriptableObject classes and design probabilities using the Inspector.
Alternatively you can also use it in any other class and control the list and it's probability distribution using the API.
For this example, we will create a biased die that rolls the six a bit more often. Name the script Die and open it.
Inherit from ScriptableObject and add a Probability List of type int.
We are using a ScriptableObject in this example because it is a convenient way to create reusable data assets directly in your project.
Once this script is created, you can make many different die assets from the same class, each with its own values and probabilities.
If you prefer working with MonoBehaviour scripts attached to GameObjects, the same ProbabilityList<int> field works there as well — only the surrounding class setup is different.
Adding the ProbabilityList
using UnityEngine;
using RNGNeeds;

[CreateAssetMenu(fileName = "dXX", menuName = "My Die")]
public class Die : ScriptableObject
{
    public ProbabilityList<int> die;
}
In Unity Editor, right-click on the Assets folder and choose Create » My Die.
This will create a new Scriptable Object with the suggested name dXX. We will create a 6-sided die, so name the object D6 Die.
Clicking on the object will display its properties in the Inspector, where you will see the Probability List Drawer.
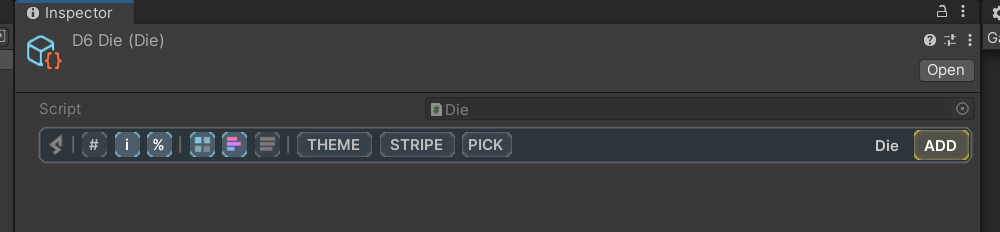
To add items into the list, click on the Add button on the right. These items will represent the sides of our die. Add six sides and specify their values.
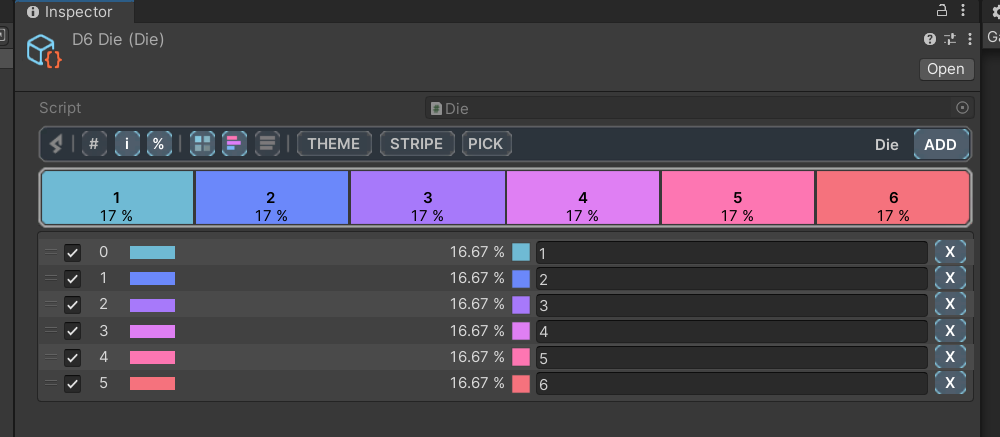
Currently, the probabilities of items are even. We want to make the die roll the six more often, but retain the even chances among the other sides.
You can adjust item probabilities by dragging their rectangles or edges on the stripe, or by typing in the value directly. Direct input will recalculate other items with respect to their distribution ratio.
Click on the 'side 6' probability 16.67% and type in 0.2 (for 20%) and hit Enter. Probabilities of other items will drop to 16%.

Now it's time to roll the die. In RNGNeeds, you can select a value from the ProbabilityList easily by calling .PickValue(). Let's make our die object useful by adding a function that returns the roll.
Selecting values from list
using UnityEngine;
using RNGNeeds;

[CreateAssetMenu(fileName = "DXX", menuName = "My Die")]
public class Die : ScriptableObject
{
    public ProbabilityList<int> die;

    public int Roll()
    {
        return die.PickValue();
    }
}
Now, whenever you call Roll() on one of your dice, you will get a single int value based on probability distribution.
Using this approach, you can now create multiple dice for your project, such as d10 or d20 and roll them easily. Each of the Die ScriptableObjects can have its own number of items (sides of a die) and probability distributions.
The same workflow also applies when using ProbabilityList inside MonoBehaviour scripts, for example on spawners, loot tables, enemy behaviors, or dialogue systems.
Speaking of which, now would be a good idea to rename our six sided die to D6 Die (biased).
What's Next?
Congratulations on setting up RNGNeeds and taking your first steps into the world of advanced probability control! However, there's still a lot more to discover. To help you navigate and make the most out of RNGNeeds, we recommend diving into the following resources:
Exploring the Basics
Start by getting a strong grasp of the fundamentals. These articles will guide you through the user interface, introduce you to key terminology, and help you customize your setup via the Preferences Window:
- Understanding the User Interface
- Customizing RNGNeeds with the Preferences Window
- Key Terminology in RNGNeeds